New Piano Keys
Don Bennett RPT
I’ve witnessed the evolution in piano rebuilding and the available technology used in repairs since I started as a technician in 1971. At that time, replacing a pinblock in a Steinway piano was seen as major surgery. Because it was needed, it gradually became common practice in rebuilding shops around the country. Next came soundboard and bridge replacement. I remember heroic efforts to shim and repair soundboards over and over, still disappointed with the outcome. Many soundboards were truly dead and the owners did not want to bury them, so in the 80’s and 90’s, soundboard/bridge replacement became fairly common in a few shops around the country. The next wave of rebuilding technology was addressing touch weight. Beginning in the 90’s, efforts to control the playability beyond regulation became common practice. More complete rebuilds required new back actions and action rails. More complete rebuilding made the pianos better, or made bad restoration candidates suddenly viable.
This brings us to new keys. Much like pinblocks, soundboards, bridges and touch weight work, key replacement has been slowly introduced to the trade by a few top techs. What first seemed impossible became proven. As the price of new premium pianos has crept up, the economic viability of high end, artistic remanufacturing has become more attractive to piano owners. This now includes new key sets.
Rebuilders have dealt with keyboards that have had keytops and bushings replaced multiple times, had bottom holes saw kerfed and keys that looked like Swiss cheese after too many reweighs. Older keyboards developed huge gaps between keys, or simply were not the best quality when new. Many have become weak or warped, twisted or noisy. Original keys have often been the weak point in an otherwise quality rebuild.
Many approaches have been developed to repair and salvage an existing keyboard. Wood has been added to the sides, key lead holes plugged and bottom holes repaired. Different dimension action parts can be installed and weights can be added or subtracted. Capstan position can be tweaked or with the adjustable whipped heel parts, can be moved a significant amount. All are legitimate solutions but remain work arounds.
In the mid-90’s, I met Rick Wheeler, owner of Roseland Piano at a PTG convention. Roseland specialized in manufacturing new piano keys fitted to the original keyframe. Seeing the need and benefit of his work, I began having Rick make new keys for me.
This was a solution for several issues. First and foremost, I now had a key that both looked good to the eye and was also structurally strong. Additionally, the key and action ratio could be optimized for the new parts by adjusting the pivot point at the balance rail, something I could never do before.
With new keys, in addition to a clean foundation for touch weight, we get new key bushings, new keytops and sharps, new backchecks, new key end felt, new capstans…the keys look really good. New front and balance pins are installed, and we start with an optimized key/action ratio. When the cost in parts and labor is added up for those jobs, a large portion of the cost of new keys has been covered.
There are two ways to put a new set of keys in a piano. For Steinway’s, we can order a new Kluge replacement set from either Steinway Parts or from Pianotek Supply. The other option for a Steinway and the first option for any other maker is having new keys made and installed on the original action frame. My company has experience with both; we have installed over 20 Kluge sets from scratch and over 40 Roseland replacement sets using the original key frame in the last 20 years.
With the new Kluge set, a tech receives the same thing the factory fore finisher starts with. Essentially the tech must do the same job as the factory worker does when fitting the keys into the piano. A new set of keys for the current production model is unboxed, and they look great. The keyframe is oversized, so the tech will have to cut the ends and locate the keyframe in the action cavity. The technician must also locate the action stack for the ideal strike point, install new riser blocks to establish stack height, install new end caps, locate and rout for the shift lever, and so on. There are some written instructions for this, but there’s a lot of “dead reckoning.” In the factory, the cheek blocks are installed after the keyframe, so expect to modify the originals as necessary.
Understand that until I had done several, I was very nervous with all the cutting and fitting. The old adage “I’ve cut it twice and it’s still too short” comes to mind. The results can be fantastic, but this work is not for the timid; mistakes prove very expensive and time consuming.
With new keys on the original frame, the tech starts much further along in the process. First and foremost, the keyframe fits into the action cavity and has functioned for many years. Strike point, stack location and capstan lines have been established, the shift rout is done, etc. In short, it’s been working. (There’s the assumption that the factory did everything perfectly but if you’ve been around more than a minute you realize that’s not necessarily true. In a factory environment, the acceptable tolerances may be greater than are acceptable to you.)
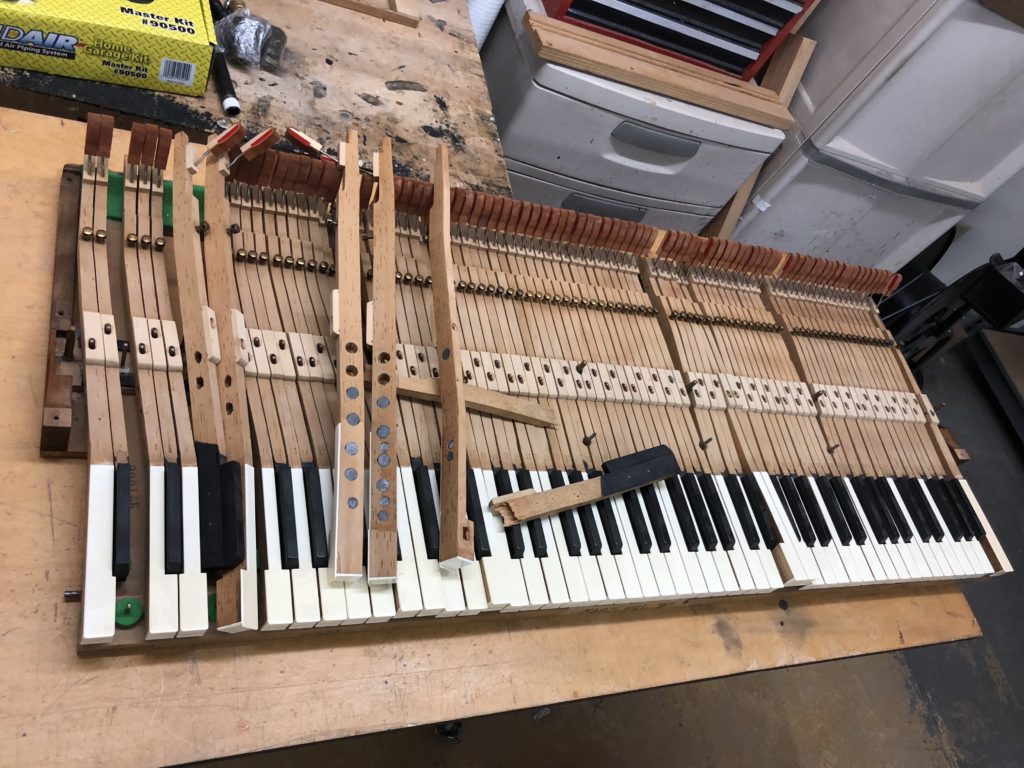
The process for making new keys on the original keyframe involves the technician taking some requested measurements, then boxing and shipping the original keys, keyframe and action stack to the key maker. In addition to the requested measurements, it’s best to make notes of observable irregularities in the original fit. By specifying the keytops, sharps, and action parts chosen for the rebuild, the key maker can consider those elements when designing the keyboard layout. Most notable are the differences in overall width and different head lengths.
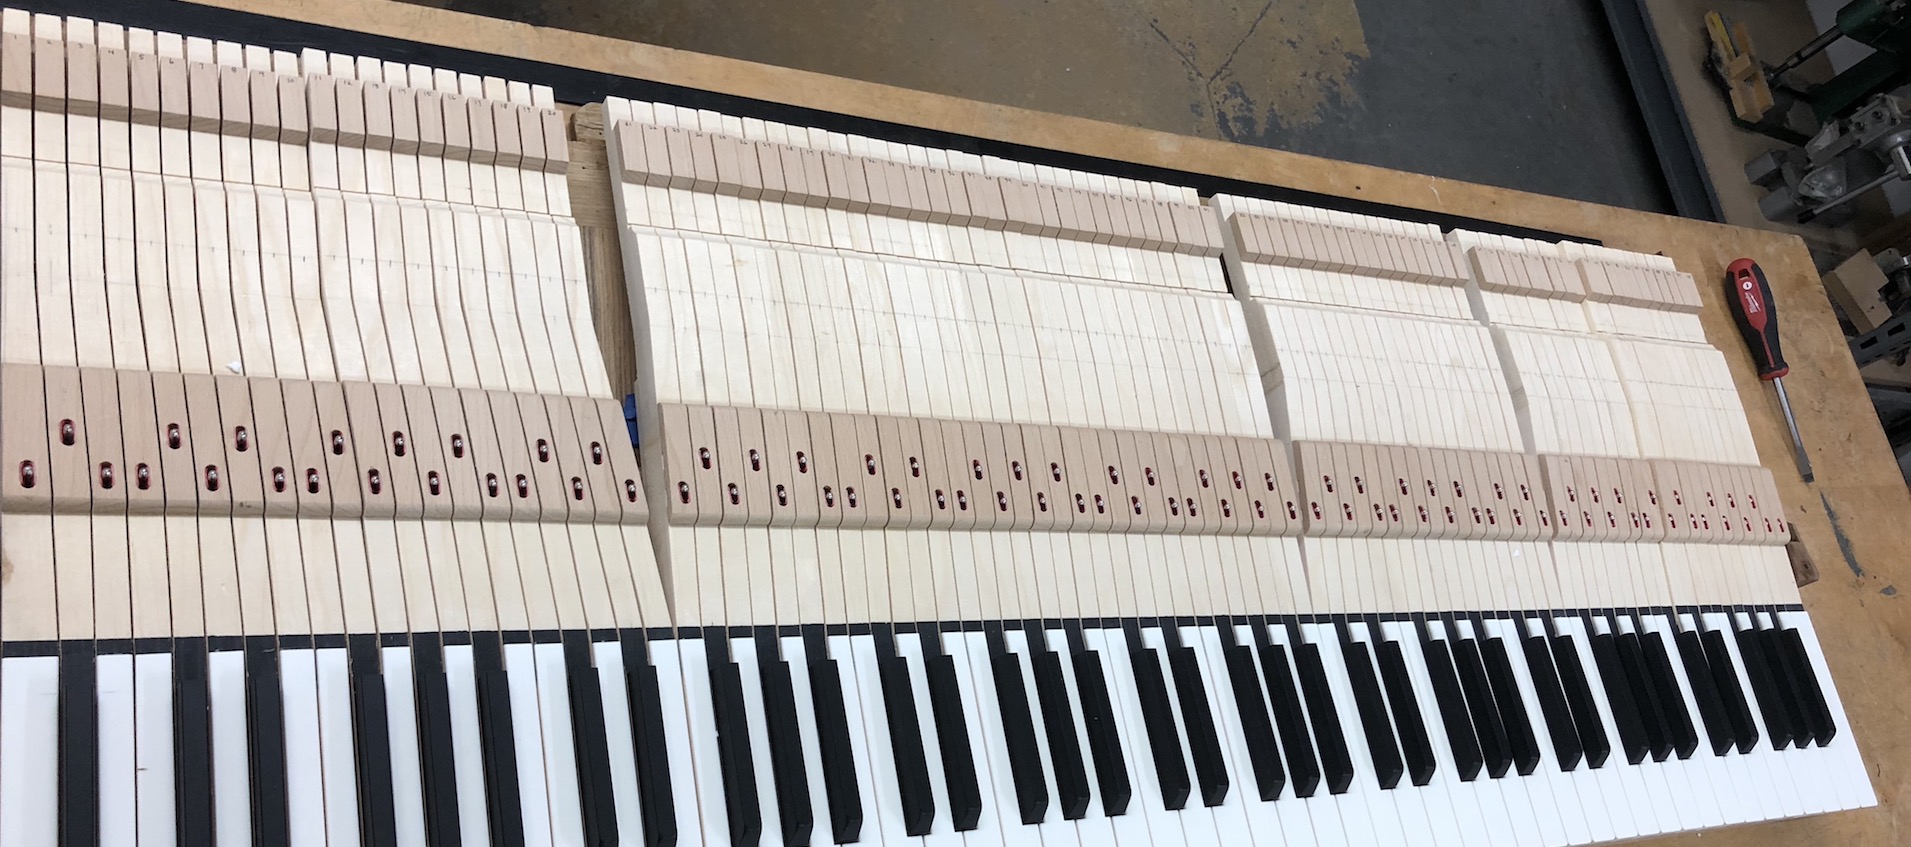
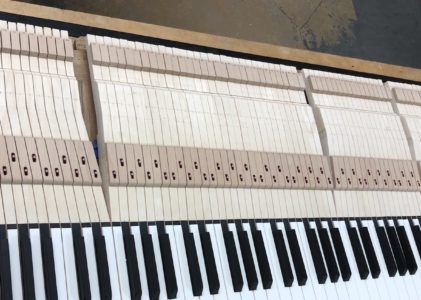
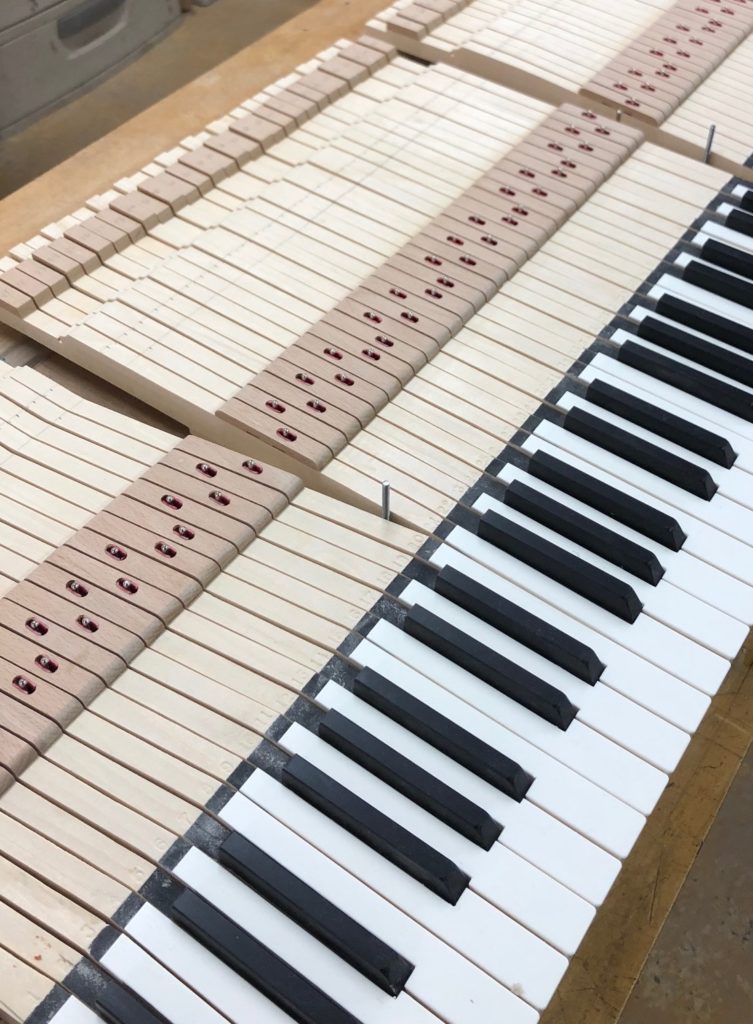
The key maker makes many precision measurements from the original keys, keyframe and action stack before beginning. If the action rails are split, warped or otherwise damaged this must be addressed before the new keys are made. The keyframe gets stripped of all key pins and felts. The balance rail is removed, all holes are plugged, and any repairs are made before cleaning and dressing it in. Hardwood inserts are installed at the front rail as well as a new blank balance rail. A new blank key plate with new button stock, along with a new top plate and shoe if required, is fit into the keyframe. At this point, layout, machining and cutting apart begins.
Once the keys are cut apart, the sanding and fine dressing begins. It’s a lot of fine sanding and detail work. Key pins are installed, sharps are installed, capstans and backchecks are installed, etc. At this stage, we’re back to work many techs are familiar with. The benefits of starting with a keyboard that already fits into the action cavity are obvious. This leaves mostly alignment, regulation and touch weight for the rebuilding technician.
There are a number of high end shops who regularly turn out artistically remanufactured pianos. The quality of this work and the performance of these instruments rivals and may exceed some top manufacturers. These shops are most likely to offer new keys.
If you aspire to do top level work and you’re not already replacing keysets, you will in the future…It’s the next big thing!
About Roseland Piano Company
My company, PianoWorks, in Duluth, GA, has been a Roseland customer since the mid 90’s. In January 2018, I called Rick Wheeler at Roseland Piano Company to schedule 4 keysets we needed for the coming year. Rick replied that he couldn’t do them because he was retiring. I asked if there was a succession plan, and at that time there wasn’t one. Within a week, I was in Portland, Oregon to see if this was something we wanted to take on. My original interest was not to add to our business by supplying the trade; I needed a reliable supply for replacement keysets that was becoming more common in our own rebuilding work. This unique skill is closely held by a very small handful of people, and I felt it was important to keep it alive, so I went forward and acquired Roseland.
Chris Palframan, who will be our lead and the primary contact in this venture, spent most of last Spring and Summer in Portland training and working with Rick Wheeler and his able assistant, Bob Rowell. I also spent several weeks training with Rick after my first visit to his shop. Chris is uniquely qualified to handle this project. He’s been managing our rebuilding shop for quite a few years. In addition to extensive wood working and machine tool skills, he’s overseen many replacement keyset installations from Roseland as well as close to 20 Kluge sets, installed from scratch. He’s very familiar with the process from the technician’s perspective.
In mid-September, a 53’ truck transported all the Roseland equipment to Duluth (Atlanta), GA where we’re set up in space adjacent to PianoWorks. The Roseland name will be maintained to add continuity for Roseland customers. Roseland will be operated as a companion company to PianoWorks.
Moving and setting up the shop was a huge task. The Fall and Winter were spent repeating Rick’s process, building a number of keysets for PianoWorks and their customers. We are now reaching out to Roseland’s customers and the tech community because we are confident in the quality of our service.
You can contact Chris Palframan at 404-578-8012 or chris@roselandpiano.com.